
The developer preview for SharePoint Framework was announced late last week, so I decided to work through the ramp-up tutorials and offer my initial impressions. I hope this will help you avoid a couple of stumbling blocks that I encountered and get you thinking about this new (and imo, very cool) way of approaching SharePoint customization.
If you’re not familiar with what the SharePoint Framework is, check out this article.
I followed the directions at https://github.com/SharePoint/sp-dev-docs/wiki/HelloWorld-WebPart to get started. I had two takeaways right off the bat. The first is that the Yeoman template is super helpful for getting spun up quickly, especially since your build process comes fully assembled. The second is that the starter project is HEAVY. The project folder (node modules included) is 244MB
While it’s inconvenient to wait 5 minutes while Yeoman spins up your project template, it’s unlikely to be a problem, as a lot of the node modules will just be used to compile and build our application. We’ll withhold judgement on the first point until we see how big the actual built bundles come out.
I entered ‘Gulp Serve’ The project built locally as promised, and I was able to load my web part locally. My first impressions are that the layout looks very modern. If this is what’s in store with the new page experience, we’re on the right track. As I made changes, they were automatically reflected in the page, a very handy inclusion in the build chain. The ability to easily change the items included in the web part properties panel will be really useful for making web parts portable. For instance, it was not easy to specify a source library in an app in the past. This makes it much easier.
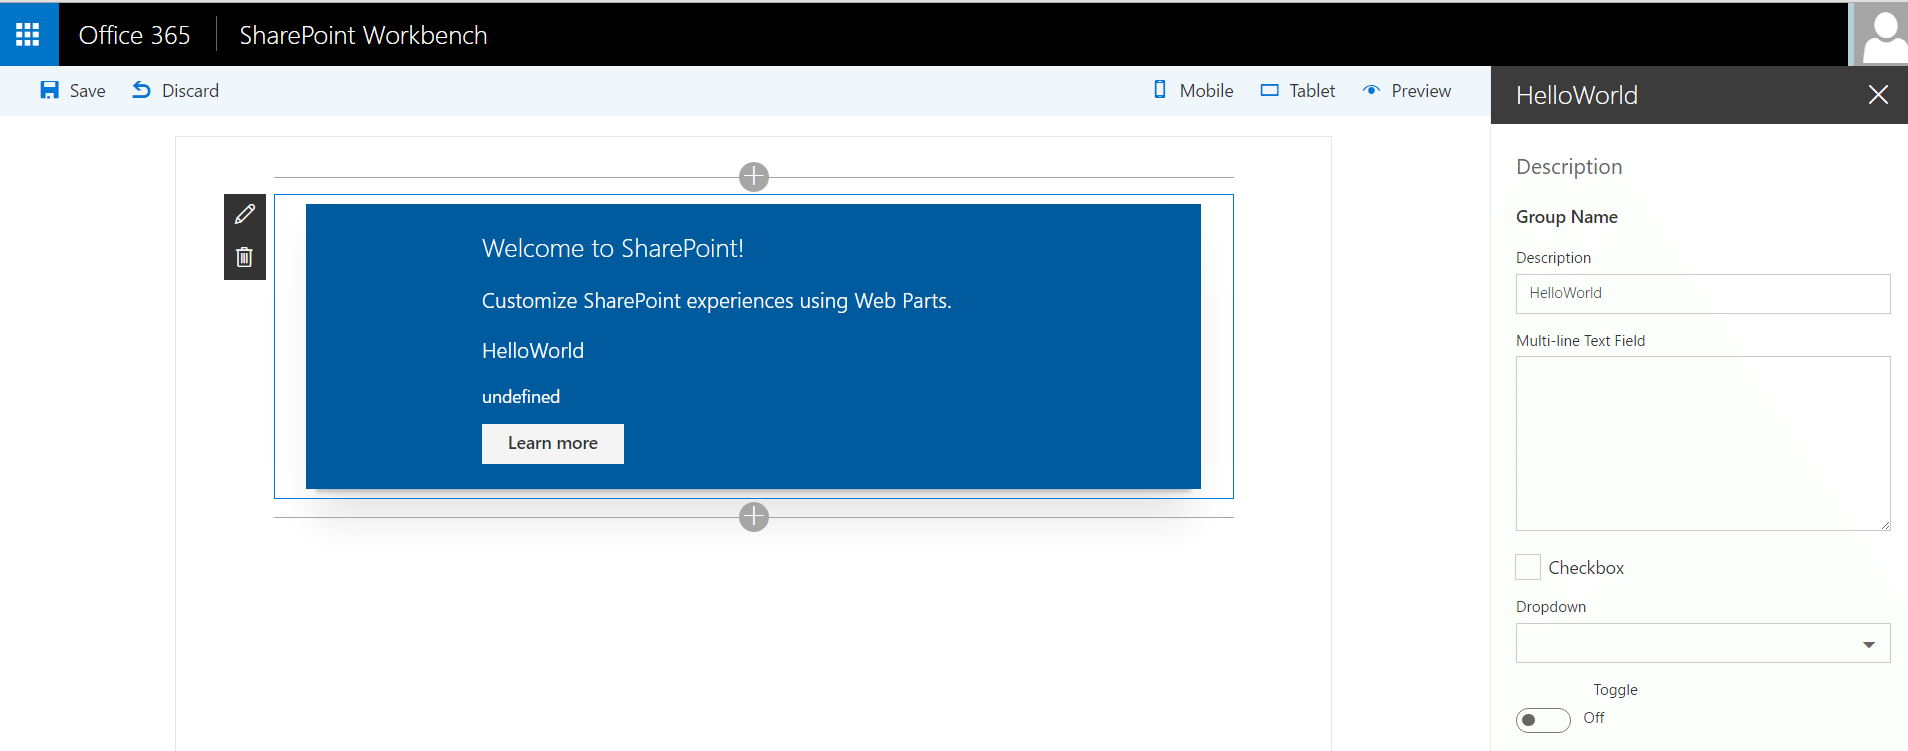
The workbench also gives you the option to see how your web part would look on mobile or tablet, which is good because a big selling point of the new client side web parts is their responsiveness and ability to play well within the SharePoint app.
Looking back at the size of the dist folder puts my mind at ease; it’s less than half of a MB.
Looking through the code structure, it’s clear that a proficiency with TypeScript will be helpful when developing these web parts, at least if you’re using the Yeoman template. Using interfaces in JavaScript is something I am not accustomed to… time to hit the books!
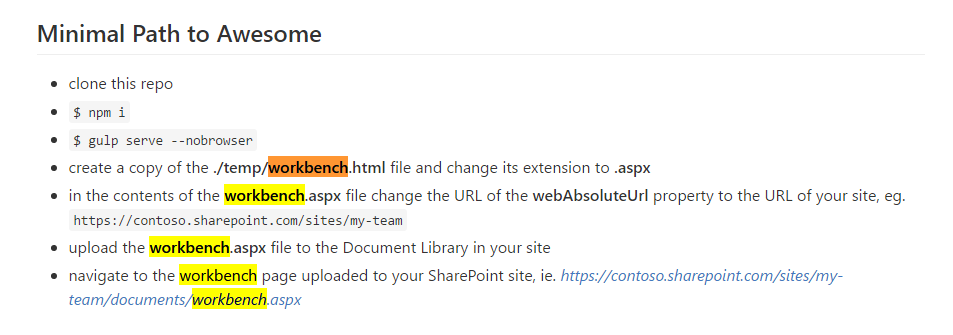
Unfortunately, the instructions for viewing your web part live in SharePoint are lacking. The full steps are outlined here, and require you to change the file extension on workbench.html, change a bit of code within it, and upload it to your dev site.
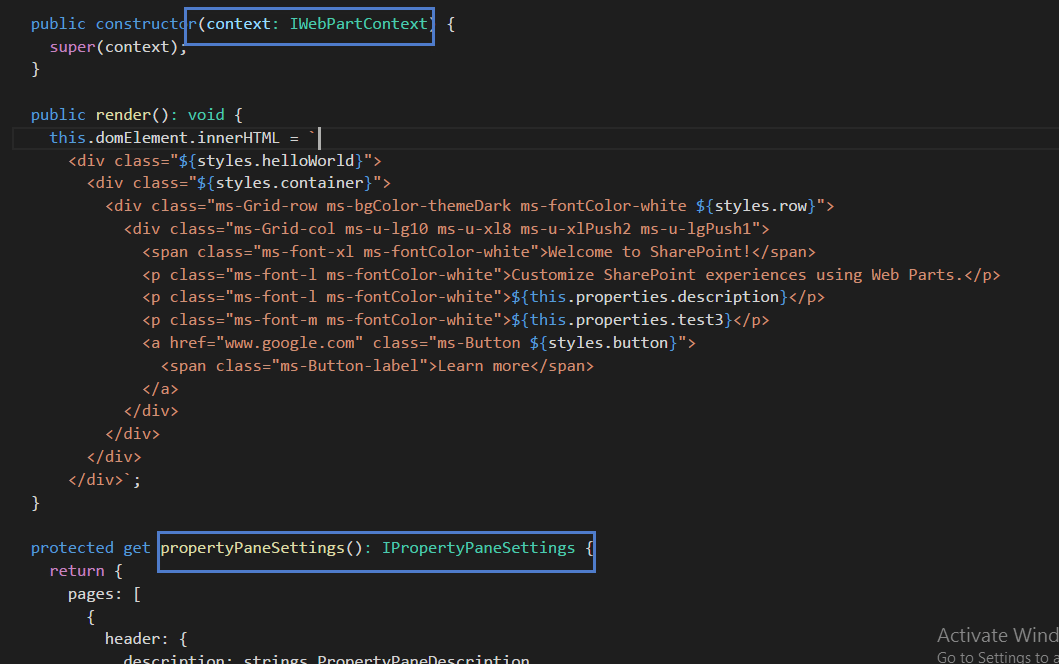
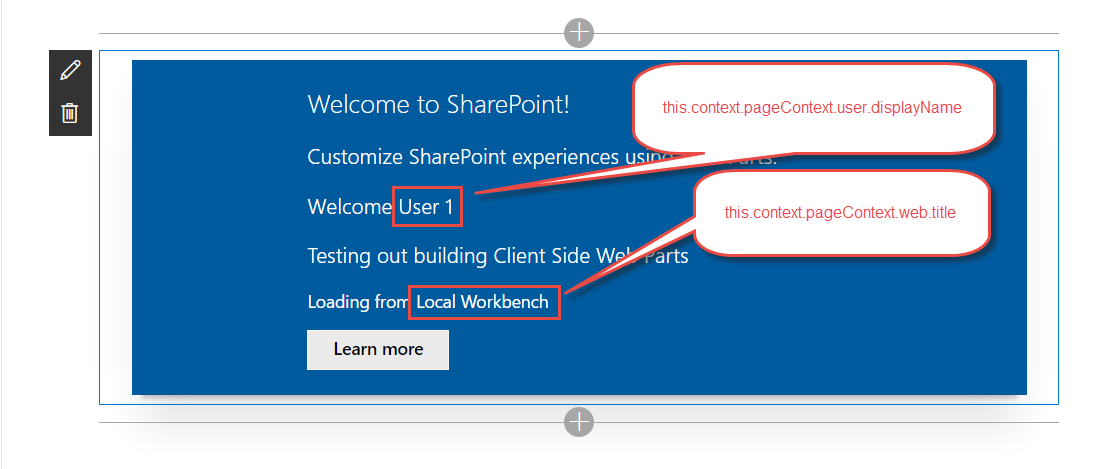
It was a straightforward task to access page context information within the web part class since assignment of those variables is handled automatically in the base class constructor. All you need to do is call ‘this.context.pageContext.user.displayName’, for instance, to retrieve the user’s name. That seems like a lot of typing, but the intellisense in Visual Studio Code is reliable when using TypeScript, and we don’t have to worry about the page context object not existing or certain SharePoint libraries not being loaded. No more ‘sp.sod.executeordelayuntilscriptloaded’, hooray!
 One thing that is a little befuddling as I was working through the second section of the tutorial was that my closing braces were not automatically being generated like they usually would be. Taking a quick look at the settings.json file on the project uncovered the culprit. Apparently this is a setting that comes with the project. I certainly didn’t make this change.

Maybe there’s a good reason why this should be set to false, but it seems really odd that a project template would ship with settings that are more personal preference than anything else.
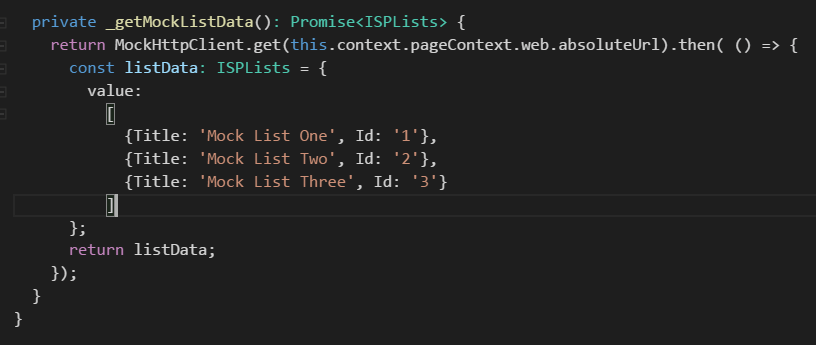
The next section of the tutorial has us creating a mock http request class, since we cannot access actual SharePoint data when working with the workbench. I get the sense that this will be a normal part of development using the SharePoint Framework. Code your web part offline, stubbing out the data retrieval, and then wire it up at the end.
As someone who is not accustomed to writing TypeScript and who has not used the Promise type in ES6, the method of data retrieval on display is a little intimidating. I would recommend developers look into these subjects as they get ramped up on the Framework.
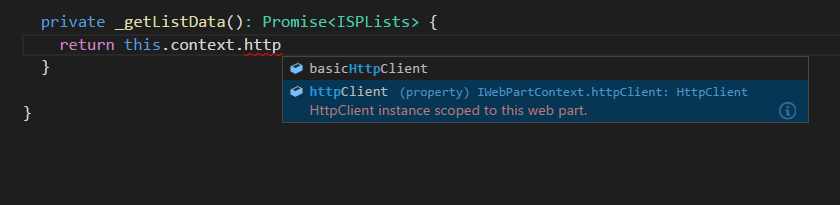
Next, we put in a method to get all the lists from the actual SharePoint site (in other words, live data). Per the tutorial, this method makes use of a call to the REST API. This is interesting, because new developers learning the framework will retrieve data from SharePoint for the first time not by using JSOM or CSOM, but through REST. As someone who uses the REST API in SharePoint almost exclusively for data retrieval do to the transparency and control it grants, I like this a lot.
Another cool feature I’m seeing is that there is an httpClient property on the context object associated with the web part. The description of the property is that it’s an instance of the HttpClient class scoped to the current web part. That is too cool. It (hopefully) eliminates the need to include jQuery just to do AJAX requests, and it (hopefully) allows for tons of reuse between your web parts when it comes to querying SharePoint.
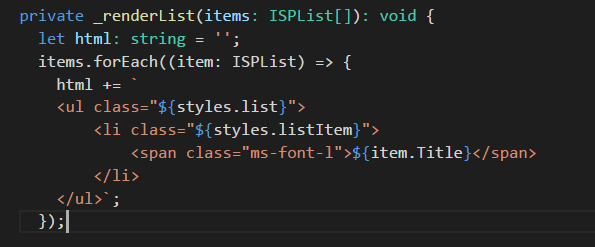
The remainder of the tutorial has us rendering the list data we retrieved to the screen at the bottom of the web part. I had two takeaways from this section.
First, it was neat that there was an environment variable so you can easily differentiate between offline and online work. By using the statement `import { EnvironmentType } from ‘@microsoft/sp-client-base’`, you gain access to a variable on this.context.environment.type within your webpart class. This allows you to do one form of data retrieval if you are on workbench and another when you are live in SharePoint. The way I see using this is to do as I mentioned earlier, make a first pass offline with stubbed out data, and then implement the data retrieval one method at a time. By using environment type, you can switch back and forth between online and offline during this process and everything will continue to work.
Second, check out how we’re getting our list info to render:
Yeah… I will be checking out the React project template that they have very soon.
That takes us to the end of the second section of the SharePoint Framework tutorial. I’ll continue on and share takeaways from the next section(s) in an upcoming post.